To set up Email sending, follow these steps:
1.Select Email.
2.Set the Active switch to ON.
3.Select the Mail System tab.
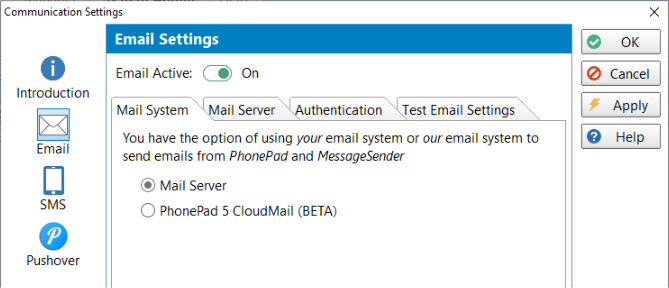
4.Select the Mail Server option.
5.Select the Mail Server tab.
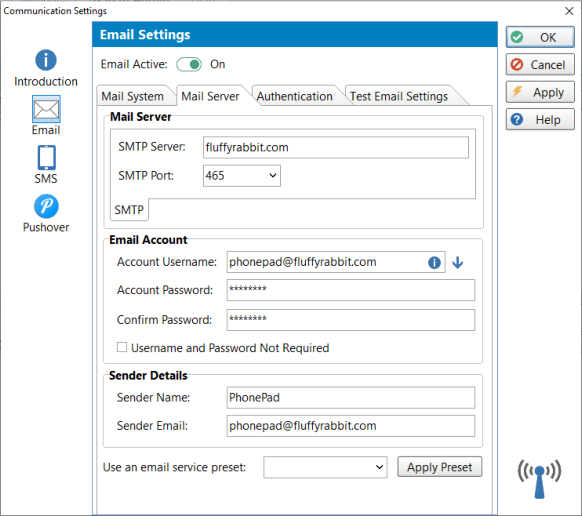
6.Enter the name of your SMTP Server.
7.Enter the SMTP Port that your mail server uses (or select a port from the drop-down list).
8.Enter an Account Username. This will normally be in the form of an email address. It’s recommended that, if possible, you set up an email account just for PhonePad.
9.Enter the Account Password.
10.Enter the same password again under Confirm Password. If they don’t match then the Confirm Password field will be highlighted in red.
11.Enter a Sender Name, or use the default “PhonePad”.
12.The Sender Email should normally match the Account Username. If you enter a different address your mail server may reject the emails.
13.Select the Authentication tab.

14.Select Automatic as the Authentication Method.
15.Make sure the EHLO checkbox is checked.
16.Check the SSL Connection checkbox if you will be using a secure connection.
17.Click the Apply button.
Email setup should now be complete. You can test the settings by selecting the Test Email Settings tab and sending a test email.
If you don’t receive a test email in your mail software then you may need to experiment with the Authentication settings to determine the correct settings for your mail server.