CloudMail Settings

Top  Previous  Next

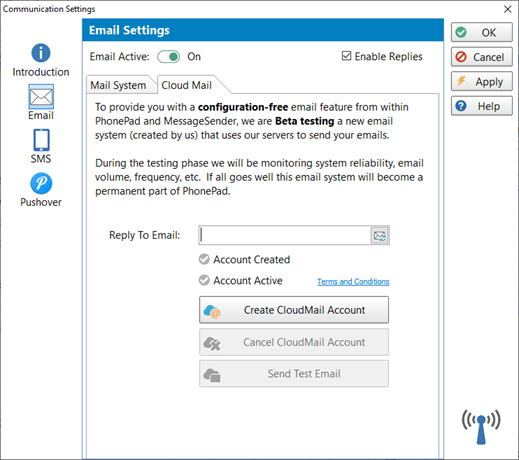
Unless you have registered an account with the CloudMail server, the Account Created and Account Active check marks will be grayed out.  This indicates that no account exists.


 CloudMail - No Account


To use CloudMail you will need to create an account:


1.Enter an email address under Reply To Email.  This is important, otherwise the recipients of your emails will be unable to reply.


2.Click the Create CloudMail Account button.


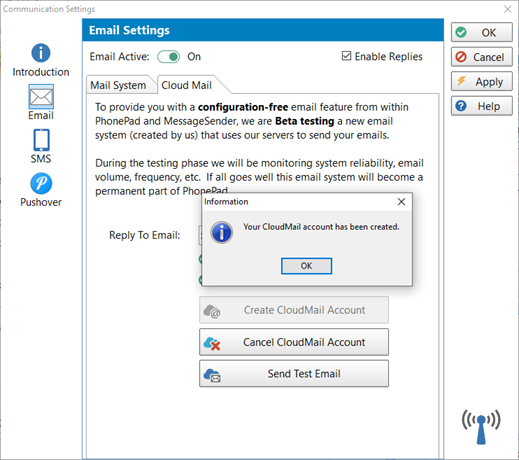
3.If all goes well the following message will be displayed.


 CloudMail - Registered


4.Click the OK button.  


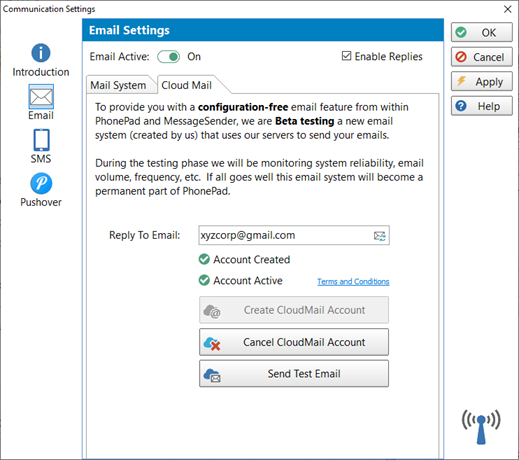
5.The Account Created and Account Active check marks should be green.


 CloudMail - With Account


Buttons

Create CloudMail Account

Creates a CloudMail account.

Cancel CloudMail Account

Cancels (and deletes) your CloudMail account.

Send Test Email

Sends a test email to the Reply to Email address so you can verify the account is working correctly.


LightBulb

If you need to change the Reply To Email at any time, just enter a new email address and click the small button to the right of this field.  PhonePad will connect to the CloudMail Server and update the email address.


LightBulb

CloudMail is in Beta right now.  At the end of Beta testing, if we go ahead with this service it will probably be available on a subscription basis although at low cost.


Please click the Terms and Conditions link to view further information.